
Part One – Cards 1 and 2
One of the best things about writing a personal crafty blog is that I get to showcase the latest things that I made, and the reading audience can choose to read my blog or not. I don’t have to feel guilty about the glassy stares from the non-crafting population. There is a chance that someone may be inspired by what I made. I hope so; I certainly am inspired by the cards made by others that I find on Pinterest or other crafting blogs. There are a lot of talented card makers out there.
 It’s time for me to start making Christmas cards for this year. I am continuing with the tradition of making my cards from Hunkydory Crafts premium cardmaking kits. This year I have chosen the 2015 Winter Wishes one, which is ironic because I live in the desert and snow is very rare. These kits are fabulous, they are perfect for beginning card makers and they add that extra “wow” factor for the more experienced crafter. The marvelous thing about these kits is that there is always stuff left over. If you are not familiar with Hunkydory’s products, the main claim to fame is their foiling, and the special coating they put on their cardstock which allows you to score and crease without cracking. Seriously, this is true, I have scored many a piece (and embossed) of Adorable Scorable and the results are wonderful.
My challenge to myself before I start dipping into my new kit was to make 10 different kinds of cards from the leftover pieces from kits I purchased over the past two years. Today’s blog is showcasing two cards made with leftover pieces from the first Hunkydory Christmas kit that I bought in 2013. It is the Festive Splendour luxury cardmaking kit. All of the kits that I am using pieces from are no longer available for purchase, but some of you out there may have the same kits, or may find inspiration about what I have chosen to make. The difference between the first Christmas card kit and the others that I have purchased is that the first kit came with printed paper inserts, which matched the Adorable Scorable cardstock. The materials in this kit went a long way, and I still have stuff left over.
Red Dress Card
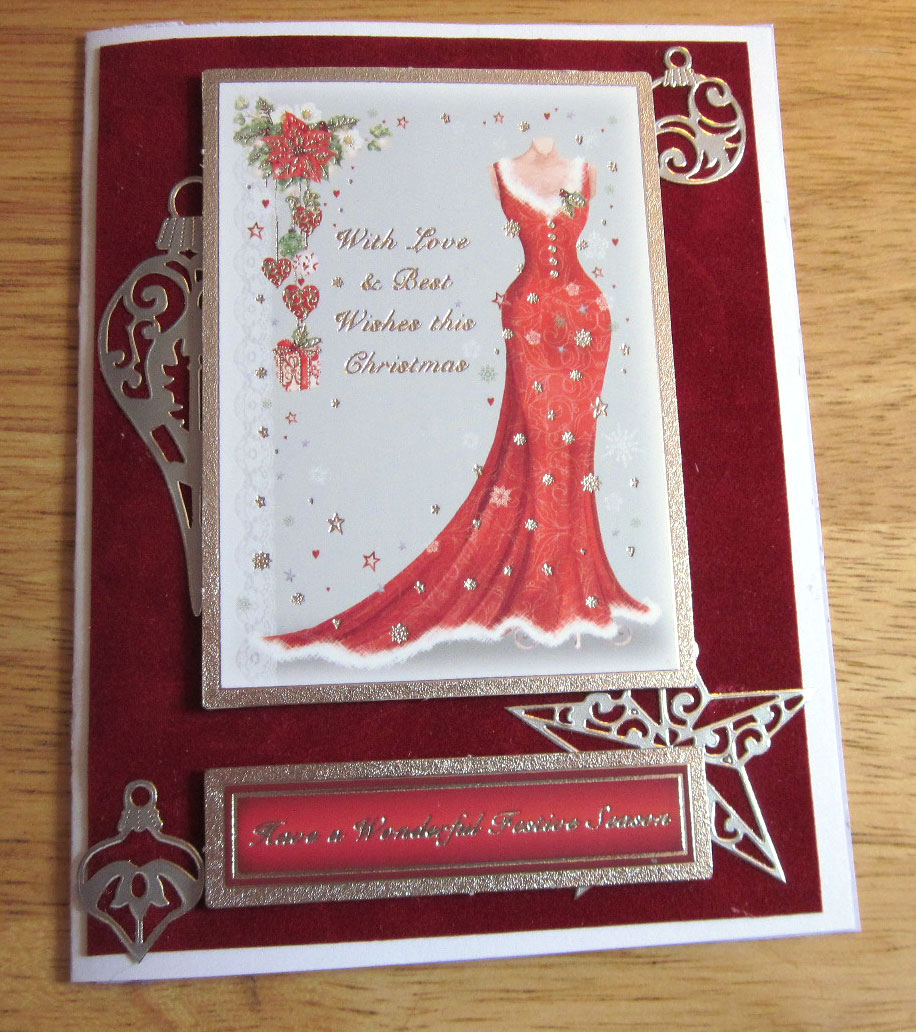 This is the reason that I bought this kit, I fell in love with the sexy red dress artwork. I have made 5 cards from this set, and sold 2 of them in my Etsy shop. This year’s card is the last of the bits that I could put together. What I had left was a small die-cut of the red dress, a couple of small die cuts, which I did not use in this card, and a die-cut greeting “Have a wonderful festive Season,” and a portion of the paper printed insert that has the mirror image of the cascading poinsettia artwork on the dress die-cut.
 I made an A2 (4 ¼ x 5 ½ inches) card using a white card blank. I layered red suede paper with silver ornament Dazzle stickers for the background and used foam pads to layer the dress and greeting die cuts. I trimmed the printed insert portion to fit the inside of the card, and put a strip of red suede paper with a silver border sticker on the left side of the image, which just skimmed the edge of the sentiment “Have a Magical Christmas.” This gives the inside greeting a little more visual interest. Here is a link to a previous blog that I wrote showcasing the two cards that I sold in my Etsy store: https://prettycolorful.wordpress.com/2014/09/14/sexy-red-dress-christmas-cards/
Deer Card
 The second card is one that has a little different background story. I made a Christmas card for my brother and sister-in-law in 2013, and a large framed Christmas card last year. I think that I made another Christmas card from this set as well. When I made the large card (which I put in an 8 x 10 matt) I used a piece of printed Adorable Scorable that was a large version of the die-cut on this easel card. Unfortunately, I forgot to take a picture of the big card before I mailed it out. Hunkydory usually has at least one piece of Adorable Scorable in their kits that has a large image. You can certainly frame these or even use them as a background in a scrapbook page.

I had a coordinating piece of Adorable Scorable that had a foiled border, and a piece of the matching printed paper insert. I layered the die-cut pretty much as it was printed on the die-cut topper sheet, gluing the silver foil frame on a 5 ½ x 5 ½ inch piece of the Adorable Scorable, and used foam squares to lift the images up from the background frame. I used a 5 ½ x 10 inch piece of dark green cardstock as the card base. I glued a 5 ½ square piece of the paper on the inside and used a piece of the foiled border on the bottom. I used the small die-cut of the deer as the “stopper” and added green pearl accents. I put a large black “Noel” sticker on the inside for the sentiment.
I highly recommend buying Hunkydory Crafts luxury cardmaking kits. As you can see, you get a lot of bang for your buck. And you have leftover bits and pieces that you can find all kinds of interesting creative things to make.
Links:
