Fun new ways to make gift card holders.

Christmas gift card holdersI made these gift card holders using coin envelopes from Hot Off the Press. I thought that I would use up some of my Christmas paper stash of paper scraps and embellishments to see what I could come up with. I came up with a Gingerbread Man and a cardinal. I made some tags with a pocket to hold the gift card, just basic tags since I needed to have a little extra length to form the pocket at the bottom. I put a Velcro closure on the back of the top closure. The gift card coin envelopes can be re-usable. You can also use the coin envelopes to tuck in all kinds of small, thin gifts like: cash, earrings, necklace, bracelet, movie tickets or a gift certificate.

coin envelopes
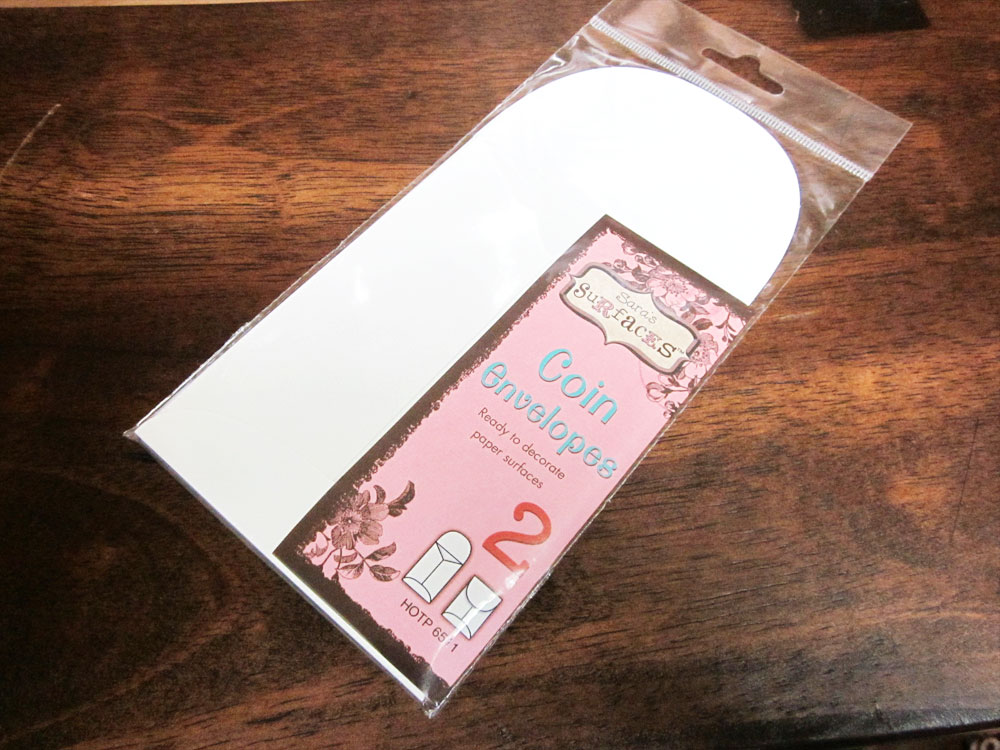
The coin envelopes come unsealed, and have a glossy side and a matte side. You can stamp on them, ink them or do any kind of multi-media project with them. I just chose to use up some of my paper scraps. I had one image left from my Christmas Sweets paper tole, which was a gingerbread man.  I chose this as one of the focals.  I used scraps from my Christmas Sweets paper for both of the envelopes, and I used a cardinal sticker for the focal of the other card. I layered the sticker on scraps of red and green paper. A good tip for doing this is to use the acetate packaging, such as the one for the envelopes, to stick down the sticker while you manipulate pieces of paper to cut around. It keeps the sticker tacky and you just need to lift up the bits that you want to stick to the paper. I had a special addition red cardinal sticker set that is not available for purchase, but there are gold and silver stickers that you can buy.

tracing coin envelopeI recommend that you trace the main body of the envelope shape on paper, then fold back the wings and trace then center portion of the envelope. Cut the paper into the three sections, and trim each of them down a little. You don’t want the paper to cover any of the fold lines. I also traced the top and bottom flaps on paper. You can ink the edges of the paper if you want. You can even ink the sides of the envelope before you glue the paper down if you don’t want to have a skinny white border. Glue the paper to the envelope. I used a good glue stick and that seemed to work out just fine. I did use ultra-tape to stick the back flaps together, and the bottom flap (the smaller oval) just to make sure that they stayed glued. And I happened to have a pack of Velcro circles and squares that were just perfect for the closure on the back.

coin envelope and tagFor the tag: I cut a 5 ¼ x 3” rectangle of cardstock, scored 1” from the bottom and folded it.  I measured ¾“ from the top sides of the card and trimmed to form the traditional tag shape, I covered the tags with paper and punched a hole at the top. I threaded pearl cotton through the hole. I used ¼ “ ultra-tape to glue the sides of the pocket, glued a ¾ x 2 ¾’ strip of paper on the front of the pocket and stuck a black Dazzles Christmas sticker on the front. I used “Oh what fun!” and “Joy” for the tags and “Very Merry” and “Believe” for the front of the envelopes.

Materials Used: (www.paperwishes.com)

The coin envelopes were quick and easy to make.

I’ve been invited to a Blog Hop

jacaranda in bloom

Jacaranda in Bloom

I am really honored that someone liked enough of what I wrote about to nominate me for a Blog Hop. I am not really familiar with blog hops. I think that I have seen a couple of craft businesses on Facebook mention them in posts, but that was it. Then Cobs from The Cobweborium Emporium nominated me in her blog hop. If you haven’t visited her blog, you really should. She has a whimsical style and all kinds of crafting projects. She frequently has a little story to go along with her projects. I would dearly love to meet her, she is just so charming! And she says nice things about my stuff. I don’t know exactly where she’s from, but I believe it is somewhere in the UK. Here’s the link to her blog hop: http://thecobweboriumemporium.wordpress.com/2014/11/12/blog-hop/

So the essence of this blog hop is to talk a little about myself, answer a few questions and recommend two blogs that I follow. The tricky part is to limit myself to recommend two blogs. There are a lot of creative voices out there.

What are you working on?

Well, lately I’ve been working on Christmas cards and gifts for family and friends. I have an Etsy Shop and have been doing a few cards here and there to display in my shop. I had a custom order for a really big oven mitt, that was inspired by a friend of mine a few years ago who asked me if I could make him an oven mitt to fit his big man’s hand. He suggested a couple of years ago that I make some and put them for sale on Etsy. Well, they haven’t sold. That is until a very nice lady asked me to make a pair for her.

Mostly, I make cards. I am finicky about paper. I could come up with my own artistic creations via Illustrator, but I don’t like the quality of printing from my home printer. I like the look and feel of professionally printed scrapbook paper and artwork that only offset printing can give you. I also only use products from companies that have a liberal angel policy because I don’t want anyone to send me a “cease and desist letter” and shut down my Etsy shop. I have fallen in LOVE with Hunkydory Crafts cardmaking kits. They have the most beautiful artwork and they use silver, gold, pearl and glittery accents to their artwork that really needs to be seen in person to be appreciated. I also use papers, stamps and die-cuts from Hot Off the Press because I like their style, and I like the weight of their paper. Fortunately Hot Off the Press has their own webstore called Paper Wishes (www.paperwishes.com) and they sell all kinds of craft supplies, frequently from some small craft companies that you don’t find elsewhere. This is where I discovered Hunkydory.

How does your writing process work?

I usually start writing in Word. I look at the monitor while I am typing and it just flows. I frequently have a topic buzzing around in my head, either because I can’t find information on it, or I have found a wealth of information and I want to put things in a more concise statement. I am a researcher. I will try to find as much information about a topic as I can, and sort out what makes sense and what doesn’t. Then I save my file and wait a couple of hours or days and look at it with fresh eyes, and edit.

How does your blog differ from others of its genre?

I don’t always write tutorials. Sometimes I just show pictures of what I have been working on and what products I used. Sometimes I have a topic that has caught my attention and I write about that. I have written several topics about copyright law and the average crafter. There are a lot of misconceptions about copyright law and I don’t want anyone to either be taken advantage of or to inadvertently step on someone’s creative rights. I still think that there should be some clarification of arts and crafts and copyright law. Especially since there are so many products that are designed for the home-based paper crafter like me. Word of advice: stay away from any images from professional sports and Disney if you want make something using the images and sell them. Their images are trademarked, which is a separate legal entity from copyright law. Also, you need to be aware of copyright law in your own country, as it may differ from that of the United States.

If I discover a new product or want to share something that I really like, I sometimes just talk about it. I’m also open to anyone wanting to send me a comment about products that they like to use or link to their blogs if they have a new technique that they are excited about. That’s the great thing about the internet; it is so easy to share with people all over the world.

Nominate two blogs that I follow

This is a tough one, so I think I will go with two blogs that I have really enjoyed lately.

https://blackflowercreative.wordpress.com/

Black Flower Creative by Mary Woolley, who loves to crochet, cross stitch and papercraft. She has shared some really beautiful items. She does her own artwork, and has a quirky kind of style. I also loved the fact that she named her blog in memory of her late dog.

http://explorenewness.wordpress.com/

Lenore from Explore Newness, has some exceptional photography, and is always encouraging you to “find something new.” She frequently posts some encouraging and thoughtful expressions. Her blogs are sometimes as simple as a photograph and as detailed as home renovation projects. She is very refreshing.

This has been a fun adventure, and I hope I didn’t ramble too much. Please comment if you have some tips and techniques that you would like to share. I always look forward to finding a new creative blog.

For anyone interested, my Etsy store link is: https://www.etsy.com/shop/prettycolorful?ref=hdr_shop_menu

Tackling Tricot

Brother 1034d serger

We just got a serger. I have never used a serger before, but I have used a sewing machine for more years than I want to admit. We got a Brother 1034d serger. It has gotten a lot of recommendations and it was not very expensive. I am not planning on using the serger very often.

We got the serger to fix tricot nightgowns. Now, I am sure that there are many who would say, why not just buy new ones. Well, they’re not for me. I am a caregiver for a disabled person and she literally lives in her tricot nightgowns. The tricot fabric allows her to move more easily in and on her bed and is stretchy and comfortable. I tried using my sewing machine on the tricot, but it just chewed it up, even when using stabilizer. I don’t think that my sewing machine likes knits or denim. But it is fabulous for quilting, so who am I to quibble.

Before we got the serger, I watched all kinds of videos and read many blogs. There are a lot of wonderful tips out there. I did some practice serging on some of my cotton scraps, just to get the feel of the machine. One of the nice features of the Brother 1034d serger is that it uses regular sewing machine needles. I thought that the best needle to use for the tricot fabric would be a ball-point needle. I also had some tissue paper on hand as stabilizer. It turns out that I didn’t need to use stabilizer. The tricot in the nightgowns is heavy enough, and all I had to do is do some experimentation on the differential feed and the presser foot pressure knob. The main thing I need to work with is redoing the hem. I don’t know what kind of stitch the factory uses, but it looks like a shell stitch, and it is constantly breaking on my poor dear. She’s not fussy, so I ended up using a 3-thread overlock stitch on the hem. I tried the rolled hem, but the tricot rolls too much to get a decent edge. I’m sure I will get better the more I use this machine.

I used the quick method of tying on the thread cones, and it did fine until I got to the end of the first nightgown (with the rolled hem). Then the lower looper thread broke and I had to rethread the machine. Which was actually pretty easy. Those videos sure came in handy!

End of the Year Resolution

I live in a small house. I don’t have a lot of room to store my fabric and papercrafting supplies. So, I made an end of the year resolution. I need to make 5 things for every piece of fabric or paper I buy!overflowing with paper This picture is just ONE of my 6 overflowing craft bins. I’m not even discussing my stash of fabric. Fortunately, I’m hooked on fat quarters. I’d hate to think what my closet would look like with all the batting and bolts of fabric!. At least my thread is organized. Kind of, in only about 3 places or so. I was hoping that more people would buy my cards from my Etsy shop.  There’s still time before the end of the year.

I did get a custom order for some big man hand oven mitts, so I got rid of a little bit of fabric. I’m making gifts for family and friends, so they can stuff said gifts into closets. Some people actually want me to make them things. Go figure!

Okay, I admit it. I’m a craft-aholic! Is there a 12-step program for this?

My Etsy shop is prettycolorful. My WordPress account doesn’t like me to link to any sites where I sell stuff.

I love Paper Wishes Week of Webisodes!

Woman with Red UmbrellaI am a big fan of getting creative ideas anywhere I can get them. If you are a papercrafter, be it cards or scrapbooking, one of the best resources is http://www.paperwishes.com/. Every Wednesday they post a new webisode that not only showcases new products, but they give you tips, tricks and examples. The webisodes are between 15 minutes to a half-hour in length. Plus, they archive every webisode that they do. In addition, they also have a link to a blog Simply Ann that also is new every Wednesday. Ann Barba is the blogger and she posts a video demonstration of a project, usually a card.
This week, November 3-7, 2014 there is a Week of Webisodes. They are showcasing Christmas kits from Hunkydory Crafts. I have noticed a few people searching for tutorials on Hunkydory’s Warmist Wishes/Windows to the Heart Christmas kit in the statistics section of my blog. I bought a Hunkydory Christmas kit a little over a month ago and have posted a couple of cards that I have made. I’m pretty sure that there will be a webisode for the Contemporary Christmas card kit. I am sharing images of a couple of cards that I have made from this kit. I am selling them in my Etsy shop (prettycolorful). You may wonder why I don’t post a link, it’s because my WordPress account doesn’t allow me to post links to sites where I sell stuff.
Here’s a link to the webisodes: http://www.paperwishes.com/webisodes/index.php?page=choose&WT.hotp_ct=home-webisode-boxHappy Holidays Red Shoes
I am an independent crafter and do not represent any particular company. I just blog about things that I like to use.